Storage Solutions: Underbed Real Estate

This post includes affiliate links. For the full disclosure policy click here.

Underbed Storage

If you follow me on instagram you’ve seen #loftlife plenty. I love it. Really its been a challenge in the best way to adapt to loft living. One of the challenges we’ve come across is how to live(realistically) in an appealing space when everything is so open. It takes very little to clutter up this loft so finding hidden spaces to use for storage has been crucial. Obviously those “hidden” spaces are scarce in the loft. But everyone has at least one great hidden space for storage: underbed real estate!

The number of underbed storage boxes and bins available is nuts! You can find them in nearly every color, size, and shape so if you have ANY space under your bed you can take advantage. We have a fairly low bed so it took a bit of extra online searching to find a set that would really utilize the whole space. I came across these and decided to give them a try. I could fit 6 total under our king size bed and they were totally affordable.

Underbed Storage Solution

After living in our loft for a few weeks we had weeded out the items we wanted to keep with us but didn’t use very often. Some of the items that made it into the bags were spare linens, seasonal clothes, and bulky beach towels. With 6 full bags these are totally life savers for our closets and cutting clutter. This is basically the equivalent of half a closet people!

Underbed Storage Solution

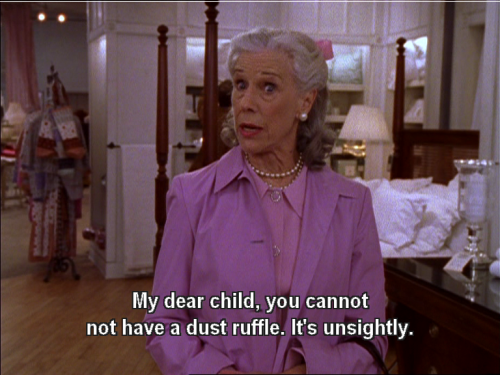
After living with the bags for a while I was completely happy with their usefulness. Their visual clutter…. not so much. We don’t have a comforter that reaches to ground so being able to see them under the bed was obnoxious. Enter my search for a bed skirt that didn’t remind me of something from a victorian home. Also, am I the only one that thinks of Bunny and the dust ruffle argument when bed skirts are brought up? Didn’t think so!

Underbed Storage Solution

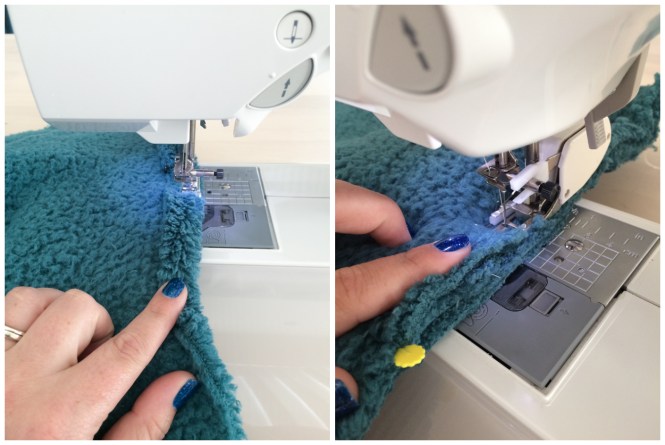
Again, our bed being lower than average meant finding a suitable product took a little extra searching. If you have a standard height bed you can use one straight out of the package. Unfortunately this was not the case for us. They simply do not make bedskirts the right size for our height. So I ordered the closest size, trimmed, and hemmed it to fit. Hemming is one of the simplest sewing skills but easily one of the most useful for DIY projects. If you haven’t mastered this I promise its worth looking up a tutorial and/or practicing. It will open up the products you can use for projects significantly.

Underbed Storage Solution

With the 6 underbed bags and and 1 custom fit bedskirt we have completely upped our storage! The fact that you cant even tell we are using the space for storage is a total bonus as well!

Underbed Storage Solution

So what spaces have you used for secret storage? Have you converted your underbed real estate into useful space? Tell me all about it in the comments!

Underbed Storage Solution
Continue Reading

DIY Pillow Case Kit GIVEAWAY!

This post includes affiliate links. For the full disclosure policy click here.

Happy Friday everyone! What better way to celebrate Friday than a giveaway(que happy dance!)?! I loved working on my last painted pillow case and decided you will too. So I’ve put together a DIY Pillow Case Kit for one lucky winner. Let me tell you all about it!DIY Pillow Case Kit Giveaway

This pillow case can be filled in with any number of colors to work in your space! I used 3 different colors from our new living room palette but the sky is the limit on this project. You could fill every triangle with a different color if thats what floats your boat!

I used a touch of Martha Stewart Fabric Medium in my paints to keep everything pliable so I’ve included a bottle in the kit as well. I’ve used this on projects big and small and it never fails me! Its easy to use and it wont change the color of your paints.

And speaking of paints… you’ll need some brushes to fill those shapes with paint right? Right! So I’ve included a set of those too. I have to admit… Im a total brush abuser. I know my art school professors would just cringe at the poor treatment but I cant help it. Sometimes I mix with brushes, leave them sitting in water, store them on the ledge of the sink…. guess Im just a casual brush owner? So its no wonder I tend to use basic acrylic brushes you buy in bulk. Ha! But they hold up well and I don’t feel guilty if one(or some) get destroyed in the wake of some creativity.

Painted Throw Pillows

Ok! To recap what this kit includes:

-1 printed 18″ x 18″ zippered pillow case.

– 6 oz. bottle Martha Stewart Crafts Fabric Medium.

-1 set Studio Paint Brushes.

Sounds pretty good right?! Right! All you have to do is pick your paints and start transforming your pillow case! So click the link below to enter and be sure to share with your friends! Good luck!

a Rafflecopter giveaway

***UPDATE***

Congratulations Diana P! You’re our winner! Thank you to everyone that entered, we had such a great time putting this together. And remember you can still shop these products on Amazon by clicking the links directly in the article.

Continue Reading

Painted Throw Pillows

This post includes affiliate links. For the full disclosure policy click here.

If you’ve been here recently you already know I have piles of throw pillows to keep my comfy level maxed out. You may also know I’ve painted throw pillows before. But after getting my hands on a new design for our living room I was itching to use those fabric painting tricks again. These painted throw pillows have a completely different feel than my first attempt but I think they are just as successful! Painted Throw Pillows

Originally, I ordered these pillow cases to use as is. And they did live happily on our wicker arm chair for some time. But after adding the throw blanket pillow cases and seeing how punchy the colors were I knew this pillow case needed something to liven it up!

Painted Throw Pillows

When I was considering how to add those punches of color I was reminded of star patterned quilts and adult coloring books. Both of them have negative space which I wanted to replicate to keep the design from getting too busy. I started playing with options in my sketch book and made sure the colors matched up with the other pieces already in the living room.

Painted Throw Pillows

Once I got the pattern mapped out and the colors finalized I set up for painting. The only prep you really need to do is wash/dry the pillow case and place a magazine(or other barrier) inside. This keeps the paint from bleeding through to the other side of your pillow case. You can also add a small amount of fabric medium to your paints. This will keep the painted sections pliable.

Painted Throw Pillows

I used a soft medium sized brush to fill in the larger portions of the design. This helped get most of the spaces filled quickly. I later filled in the edges with a small flexible brush. The paint will get a bit watered down in consistency from the fabric medium. Although, I found using a damp brush also helps with fluidity. This was mostly helpful when I was working on the edging. Be sure to add water sparingly as it may make your paint “bleed”.Painted Throw Pillows

It only took a few Netflix reruns to fill in the design and I think the pay off was well worth the time. So another throw pillow success in the books! Ha!

Painted Throw Pillows

Have you tried any throw pillow DIYs lately? Painted any fabric? Tell me all about it in the comments!

Painted Throw Pillows

Continue Reading

3 Simple DIYs

This post includes affiliate links. For the full disclosure policy click here.

As much as I’d like to design and create all the decor and furniture in our homes from scratch its just not realistic. On the other hand, plucking something off a shelf and bringing it home to use “as is” is pretty rare. So generally I do a little of both. Some projects are more involved and some (like I’m about to share) are very simple. I promise it doesn’t always take a great deal of time or skill to customize your decor and I’ve got 3 simple DIYs to prove it!

  1. Paint.

Its generally my go-to when I want to alter a piece. Its inexpensive, nearly limitless in options/colors, and you can add it to pretty much any surface. I picked up this awesome wood planter at Target to update my bedroom plant scene. I loved the raw wood and it fit perfectly in my copper plant stands. Except… it just… needed a liiiiiiiiil somthin…ha!

3 Simple DIYs

After placing it next to the other pot I was using I figured I could pull some of that stripe-y goodness and make them look coordinating without actually matching. I threw on a couple wraps of painters tape and filled them in with craft acrylic. Since the plant will live inside a liner Im not concerned with moisture getting to the paint and didn’t bother with any sealer. Adding simple painted patterns or stripes is a quick and easy way to get some of the colors you want in your space on your decor.

3 Simple DIYs

2. Ribbon.

Ribbon, twill tape, twine, yarn…. basically anything you can wrap and tie! I may or may not have a crazy amount of ribbon(and the like) from my days working at both a craft store and then fabric shop. So it shouldn’t be a big surprise this is another quick trick I use often. Again, the variety factor is amazing with these materials and you can generally find something that works with the vision you have for your space. Another perk about simply tying or wrapping something up is the zero damage factor. You can embellish something and later on down the road change or remove your addition to suit another room or design.

3 Simple DIYs

This was truly as simple as: wrap, knot, and trim. Its not a crazy makeover but repeating that white stripe makes it visually tie in with the rest of the room juuuuust a bit more. Not all upgrades need to be big to make a difference!

3 Simple DIYs

3. Washi Tape

Speaking of zero damage, lets talk tape! Washi tape that is. You can add this to so many surfaces and it will peel right off whenever you decide your done with that look. The last time I hit the craft store there was a whole section dedicated to washi tape so the possibilities here are pretty fab. I’ve used washi tape on quite a few projects now and I will say it does better on smooth surfaces. Surfaces like glass work especially well so when it was time to upcycle this old candle holder into a planter I knew tape was going to be my quickest bet. Also, you can layer your washi tapes to create your own patterns and designs. Yay for getting bonus tapes!

3 Simple DIYs

And you can finally keep your collection on display in these adorable dispensers(yes, Im totally obsessed!).

3 Simple DIYs

So are you a customizer? Have you livened up a new piece? Or upcycled an old treasure? Tell me all about it in the comments!

Continue Reading

Marbled Planters

This post includes affiliate links. For the full disclosure policy click here.

I titled this “Marbled Planters” but honestly it could really be “Marbled Anything”.  I promise once you do this project you will be looking around wondering what else you could pour, swirl, and dip! Its so addictive you guys! And it only takes a few(very inexpensive!) supplies that you probably already have on hand.Marbled Planters

If you have a planter that has sections you’d like to mask off use painters tape. I wanted to keep the “raw edge” on my cement planters so I masked off those bottom portions. You could also use the tape to add a decorative design(double creative points for that!).

Once your planters are ready and your work surface is set up fill your container with water. You want enough to keep space between the surface paint and the bottom of your container. If you are marbling a large pot you might want something deeper as you might dip further down while rolling.

Start adding your nail polish in random swirling patterns. You aren’t creating the “marble effect” yet but you do want your colors to overlap. I only used 3 different colors but using more or less is totally doable! One tip I read and actually found helpful is keeping the bottles close to the surface while pouring. This keeps your paint from hitting the surface too hard and just sinking to the bottom of the water.

When you have your colors overlapped pretty well and the surface is covered you can start swirling! This is insanely satisfying! You need to work fairly quick because the polish starts to set up pretty fast. I didn’t use a “quick dry” polish and I still had to work quick so I would skip those varieties if possible.

Once you have a pattern you like start rolling your planters over the surface. The polish will basically cling to the surface of your planters. You shouldn’t have to dip too far into the water although I double dipped (deeper and/or more shallow) just to test it out.

If you’re working with more translucent colors overlapping your rolls and dips can create a pretty cool effect but it doesn’t look as “traditional”. Also, if you choose to work with those types of polish be warned your planter(and its original color) will most likely show through. I had a couple areas where the yellows showed through but its part of my current color scheme so I was ok with it. I’d highly recommend doing a “tester” or starting with a planter your willing to love just a lil less(LOL!) until you get the hang of it.

If you’re really attached to your current manicure you may want to use gloves. Ive always been a bare handed painter and seem to have a different pallet in my palm after my DIYs… I cant be the only one!? I think it was easier to handle the planters without having the extra slip factor of gloves but again, to each his own! And if you to dive in sans gloves fear not, a little polish remover or acetone takes off any marbling remnants in just a few swipes. But just to be safe you might want a few paper towels on stand by.

In between rolls you’ll also want to clean the surface. Again, the paint sets up pretty quick so you should be able to pull any extras off in sheets. I waited maybe an extra 30 seconds and ran a toothpick over the surface to pick up the remnants.

Let your finished planters cure up for a day or at least overnight. If you have any areas masked off check a small section before removing. If any of the paint starts to peel up with the tape you can run a utility knife along the edge to get a clean pull. This only happened  in one area for me and the paint was super thick in that section.

Now enjoy giving your old planters some new life! I’m completely obsessed and cant wait to marble some more items in our loft. Im sure I’ll be back shortly with more marbled projects!

Have you already jumped on the marble train? Done any notable planter DIYs? Tell me all about it in the comments!

Continue Reading

Throw Blanket Pillow Cases

This post includes affiliate links. For the full disclosure policy click here.

Throw pillows. Can you ever have enough? I think not! We have quite the collection throughout our home but the pile that lives on our couch really needed updating. Speaking of updating, the colors in our living room are all new for the loft which is so overdue. Ive been holding onto this color inspo board for sooooo so long and its finally getting used(YAY!). Only problem with that is finding pre-fab decor items in such punchy colors. So I’ve had to get extra creative and the throw blanket pillow cases were the perfect start!

As I said, the colors I picked(and LOVE!) are not ones I’ve been able to find right on the shelf in the items I need to replace. So when I found this cozy throw blanket at Target I snatched it up real quick. At first I thought I would just use it as a throw for couch snuggling and we did use it for a short time. But after trying and failing to find pillow cases in the right color I realized the throw was basically just a piece of fabric in the ideal shade.

Throw blanket pillow cases

After skimming a few tutorials on Pinterest I realized I could make these super basic and skip the time consuming details like zippers(double yay!). I love sewing. Really, I do. I’ve been doing it since I was a kid(thanks Mom!) and I’ve sewed everything from simple blankies to very detailed garments like my wedding dress. And as much as I appreciate intricate stitched items nothing beats the high of completing a project in 20 minutes! Yeah, you read that right! 20 minutes my peeps!

Throw blanket pillow cases

The very basics of my envelope pillow case: Trim off original rolled hem. Roughly measure enough fabric to cover pillows with 4″ overlap. Hem flap edges. Fold with right sides together so the hemmed edges overlap 4″. Stitch down both lengths. Turn right side out. Soooooo basic!

Throw blanket pillow cases

If you want to get really precise or if you are using a less forgiving fabric by all means to the math. Map out your cuts, iron your seams, and pin EVERYthing. I’m sure my old sewing teacher would recommend doing every single one of those steps! But! Being this fabric is a fleece with a stretch and it was going on slouchy pillows I skipped those deets and it all came out perfect. At least to my eye!

Throw blanket pillow casesThrow blanket pillow cases

One thing I will recommend is a walking foot. My machine is older and I’m sure its not the most fancy attachment but it makes a difference. When I hemmed the flaps(literally eyeballed it and folded over as I went) I used the regular foot. But once I folded the fabric over itself and started sewing it shut I was going over 3 thick layers of fleece. The walking foot kept everything moving smoothly and I promise its worth switching out!

Throw blanket pillow casesAlso, if you wanted to add a closure but still don’t want to deal with the hassle of a zipper a button would be perfect. Especially if it was something chunky, decorative, toggled, etc. Like I mentioned before, these pillows are super slouchy(which is why they’re so cozy!) so for now the envelope style sans closure is awesome. If I stumble upon a great decorative element later on I could still hand stitch it on. But for now these pillow cases are giving new life to our couch scene!

Throw blanket pillow cases

So have you repurposed any fabric lately? Cut up blankets for any other DIYs? You know I’d love to hear all about it in the comments!

Continue Reading